After she left, I showed it to The Partner Who Is Not My Husband. "She expects me to make THAT! Who does she think I am? I'll never be able to do that!" I wailed. "Of course you will, honey" he said with great conviction, "With a bit of practice you can do anything".
He may have had cause to regret his optimism as I immediately packed him off to the hardware shop for fuse wire. He came back with the last 2 cards of fuse wire in stock, having been told that no-one uses it these days due to modern circuit breaker fuse boxes. Luckily (though not for him),The Partner Who Is Not My Husband happens to be a radio ham, so I had him find all the unused coax from his antennas and strip off all the plastic coating to leave me with the bare copper inside. Most of it was too thick, so off he went yet again to the hardware shop to buy electrical cable. After stripping 100s of feet of various cables, he was probably cursing Daughter #2 as much as me.
Finally I had several lengths of usable copper wire to play with, so I set about practising said daughters ring. Surprisingly my first attempt wasn't too bad, although the wire was probably on the thick side. I kept trying until I ran out of wire. Then The Partner Who Is Not My Husband, faced with yet another trip to the hardware store and even more stripping of the plastic coating, did something very unusual... He begged me to go on ebay and buy some proper wire! Yes, that's right, he actually gave me his blessing to venture into realms that fill his wallet with horror!
I actually got lucky first time and found a supplier who sells what I now know to be the best quality jewellery making wire on ebay. (I know this because I have since tried other suppliers and found their wire is not up to scratch. Well actually that is ALL it's up to... ouch!)
Anyway, now full of confidence that I COULD do this, I rang Daughter#2 and we agreed she would have a red aventurine and copper wire ring. As it was now almost her Birthday, she ended up with not only the ring, but also a bangle, a bracelet and some earrings to match. She showed her gratitude by asking if I could also make her a silver one with black agate! Which I duly did. Then I decided to experiment and made one with turquoise shades of swarovski crystal, which was so successful that it was immediately appropriated by Daughter #1! (Ah children make such perfect guinea pigs!). The ring in question has attracted so much attention that it has now become my brand logo (and my avatar), as so many people have recognised it and commented on it!
So I now had two happy daughters and The Partner Who Is Not My Husband was happy that he no longer had to strip wire for me and that yet again, he had been proved RIGHT! (Oh how he enjoys that!). He had told me that I could do it, and as it turns out, I could!
Next came a brooch or two, again out of the book.
This was the first attempt. I showed it to The Partner Who Is Not My Husband, who promptly dropped it... and it broke! He was suitably mortified, but after my initial horror, I realised he had actually done me a favour by highlighting its flaws, thus enabling me to tighten my quality control in future pieces:-
Then feeling brave, I decided to venture into the unknown territory of memory wire. This is a cautionary tale for budding wirework artists everywhere! Memory wire is heat treated to make it extremely hard, which is how it retains its shape. You need heavy duty tools to work it (it will ruin your ordinary side-cutters if you attempt to use them on it), which for me actually wasn't the problem, as I had them. What I didn't have was heavy duty hands! (I have arthritis in my fingers and wrists, but was still undeterred!).
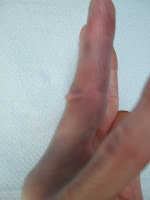
The culprit! The result!
It's really not as vivid in the photo, but in reality both of my fingers, inside and out, turned completely black and purple, then faded through brown and green, due to a burst vein caused by the pressure I needed to apply with my pliers. It hurt like hell and took weeks to heal! Needless to say I am much more careful with memory wire these days!
Next stop was a bridal tiara, a great way to learn wire wrapping techniques. (If not quite as good at dropping hints to The Partner Who Is Not My Husband!)
I have now become much more competent at working with wire and soon began designing my own pieces. I really enjoy its endless possibilities and its forgiving nature. I have recently invested in some professional wire working tools, such as nylon jaw pliers to smooth out any kinks, a cup burr and some needle files to smooth any rough edges. However all you really need to get started are a good set of side-cutters, and a pair of round nose and chain (snipe) nose pliers. Copper wire is easiest to practise with as it is softer, but a good quality silver-plated wire is an excellent choice after that as it is non-tarnish. Coloured wires are also available, but choose one with a copper core. Aluminium wires are for general crafts rather than jewellery making. Take care when cutting as small pieces can end up in your eyes. It is recommended that beginners wear safety goggles, but with practice, you can learn to control your cutting. Stay safe, but above all, have fun! Working with wire is very satisfying. The only limit is your imagination!
Here are some of my latest designs:


